skip to main |
skip to sidebar
It was the one recipe that I was looking the most forward to making, but like with many good things in life, it didn't quite turn out how I expected!It was the one and only Croquembouche, the all important tower that many attempt and fail... ant say I was really an exception haha. As I am sure you can tell I wasn't too pleased with my attempt, but I tried nonetheless!My biggest downfall was probably not ensuring I had all the utensils needed, most importantly the correct piping nozzles for the profiteroles and filling.For those who don't know what a croquembouche is... simply put.. its a tower of cream filled profiteroles, each topped with caramel and spun with the sugar caramel once completed.Might sound simple.. but it took up to 2.5 hrs to complete, and several burnt fingers later, it was done!The first step was to make the pastry cream filling which requires two steps;1) heating the milk and vanilla bean2) whisking the egg yolks, sugar and cornflourThen combine the two, whisk and place it back on the heat and stir until thickenedProblem #1: the filling didn't seem to be coming together quite as I had expected, it was quite runny, so I decided to whisk the mixture rather than stir with a spoon (like the recipe had suggested), and thankfully within seconds it began to thicken nicely.Then you must spread the mixture on a tray to cool it down quickly and cover with cling film until its about 55'C, and then stir in the butter and refrigerate until cold.Problem #2: My thermometer broke, so I kind of just had to guess and feel it to see if I thought it was approx. 55'C (nooo idea what 55'C really feels like, but my thought was its slightly hotter than body temp so I went with that ha) After making the cream filling, it was onto the choux pastry (profiteroles). Thankfully I had made this before in hospitality prac in Year 12, so I knew exactly how to do it. You need to cook the butter, milk, sugar, salt and water in a pot and boil it, then add the flour and stir until it forms some sort of ball that comes off the side of the pot.Once its cooled a little, you beat it to let out some more heat and then beat in the eggs one at a time until a nice pastry forms.
 Now onto the piping. Some people might find this relatively difficult, but I love doing it, so I'm used to it! The only problem is I didn't actually have the right size piping tip for the balls, so they ended up looking like meringue shaped and where WAYYYY to big in size. No turning back now! haha This was one of those times that I just had to deal with what I had, cause I sure as hell wasn't making another batch of profiteroles :)
 Once the profiteroles were baked and cooled (thankfully, they were nicely puffed up!) I then had to fill them with the cream filling. Once again I didn't have the correct piping nozzle, so this was very very difficult. Infact, after my first piping bag broke open, I ended up making the piping bag out of the zip lock bags which I usually do, but it made it very hard to pipe! After succesfully piping most of the profiteroles and finishing all the filling, I had just enough filled profiteroles to build the tower.Then it was onto the caramel, probably the easiest part as far as making it goes; place sugar, water and glucose in a pan, bring to the boil and once it has turned a nice caramel colour, place the pot over a bowl of cold water to cool down, and then dip the profiterole base into the caramel and set upside down on a lined tray.You also need to make the base of the tower by pouring the caramel in a cake tin so it's filled approx. 0.5mm high.
 Once all this was done and set it was time for the assembly.This basically involves using the croquembouche cone and placing the filled profiteroles around the inside with the caramel. Had I been warned, I would have worn gloves or some kind of hard core hand protection because my fingers were soooo badly burnt from that caramel. You practically have to stick your hand in it, because you need to coat the outside of the profiteroles in caramel so it sticks to each other and the cone. Once its all completed and the base is in place, I carefully turned the cone over, and held my breath hoping that the croquembouche comes out in one piece, the last thing I could have dealt with is turning it out and the entire thing falling apart. Luckily.. that was the one successful part of the dish :)
 Now the finishing touches! Once the tower is up, it's time to decorate.. dip two forks back to back in it. Spin toffee around the Croquembouche and DONE!!! (I might have gotten a bit carried away with the spun sugar, but it was soo fun to do, despite the mess it made in the kitchen!)Finished.. finito... fini...afinado, but not without scars to tell the tale!Unfortunately, the tower didn't turn out how I had hoped, but when it comes to my desserts I am a perfectionist, and I guess I'm just happy this one was finished and standing up straight!Check it out, here's the final product:
 If anyone watched the finale of Masterchef, I'm thinking my next dessert is the guava and apple custard snow egg! Looks AMAZING!!! Until next time, Eat Up!
It might have taken me a while, but yes I have finally conquered the 'healthy' recipe! I will admit, it was quite time-consuming but well worth it, because between 3 of us we polished off enough to feed approx. 6 people!The challenge: tuna sashimi tasting plate - consisting of tuna avocado sushi maki, tuna tataki (with daikon salad) & tuna sashimi tacos!The show allowed the contestant about 2 hours to complete the challenge, so I set myself a time limit of 2 hours 15 mins. Overall, all the process were quite simple, the only problem was that there were alot of elements to each dish. Luckily, they were able to be prepared before, which meant that the assembly was the busiest part.The dish I started on was the tuna & avocado sushi - the first step was to thoroughly rinse the rice, leave it to sit a bit and cook it, and while that was cooking I was able to prepare the rest of the dishes and elements. Once the rice was cooked, cooled and seasoned (and all the tuna and avo pieces were cut up) it was ready to roll. The sushi roll was an inside out roll, so it was a little bit difficult to handle because it was quite sticky on the outside, but it was still manageable and turned out very nicely! Without realising it I had actually eaten half the ingredients while I was cooking and cutting everything up, so when I came to rolling it I luckily had JUST enough to fill it! Very close call.. (not to self for next time... stop eating! well at least until it's finished!)Tuna & cucumber sushi:
 The tuna tataki is not completely raw tuna, it must be lightly seared after being coated in salt and pepper and allowing it to set for approx. 20 mins. So this meant I had to get this coated first and allow to sit, and then seal in a very hot grill pan. After it was sealed for about 30 secs on each side, I quickly popped it in the freezer so that it would stop cooking and could firm up a little (this helps to slice the tuna much more easily)Tuna sashimi (coated before searing):
 Daikon & beansprout salad:
 The other element of the tuna tataki is the daikon salad. This was probably the most intriqette part because you have to really thinly slice the daikon, and after nearly cutting of my finger twice, I finally managed to get a few nice slices to serve.Once this is done, it gets rolled with the bean sprouts some mesculun and topped with the thinly sliced seared tuna and dressing (which I made from scratch from onions, mustard, vinegar, water, oil)The easiest dish to prepare was probably the tuna sashimi tacos, becuase all the elements were cut up and prepared at the beginning and then quickly assembled at the end. It basically invovles deep frying some wontons into taco's, and filling with the cut up tuna sashimi (comgbined with onion & garlic) and then topping with the salsaTuna sashimi with garlic and onion:
 Wonton tacos:
 My first attempt at salsa didn't go quite as planned. I had bought red birdseye chilli's instead of jalapeno's.. and these red ones are MUCH hotter! I also used salad onions instead of spanish onions, and didn't realise how much stronger they were. After combining all the salsa ingredients I had a little taste and within 2 seconds my mouth was burning and eyes were watering.. so I figured it was only smart to chuck that batch out and start again from scratch. Luckily that doesn't take to long, and the next mixture was much much milder and easier to eat.. woops!After nearly 2 hours of preparation I was now preparing myself for assembly, because I knew this would be difficult part. I started off with the rolling of the sushi, and placing the avo on the outside to be rolled again which overall took about 5 mins (because I am a perfectionist). Next was the tuna tataki, which required rolling the daikon slices with the sprouts & mesculun, and placing ontop of cucumber slices and topping with tuna and garlic chips. Finally, there was the tuna tacos which as I said was easy as pie... Just stuff the tacos with the tuna sashimi mixture and salsa and a squeeze of lemon.

 As I finished I took a step back and realised there was actually a hell of alot more food than I expected and after considering inviting more people over to dinner to finish it off, my dad looked at me as if I was insane and assured me there would be nothing left for anyone to eat, and after I tasted one tuna tacos I nearly polished off the entire place, it was delish!!!I wouldn't quite recommend this dish to everyone because it takes a while, but if ur willing then go ahead! You may be pleasantly surprised at what a healthy nice dish you can put up!Just incase you were wondering.. i managed to complete all three dishes in the 2 hours and 15 minutes, with a few minutes to spare so I could quickly eat some before everyone else got to it ;)Check out the finished tasting plate below:
A
s promised, maybe a little bitter sooner than later, this one is for the chocaholics!As I got into bed last night and turned on masterchef, as soon as I saw this recipe I knew it would be my next 'challenge'Word of advice... NEVER try and make this dessert let alone anything that smells like this while your trying to eat breakfast, was not an easy feat!There are two parts to the dessert: the chocolate fondant and the amaretto milkshake. Unfortunately we don't have amaretto liqueur lying around my house, so I just substituted it for butterscotch liqueur, and might I say it smelt damn good!Step 1: Make the butterscotch milkshake - milk and vanilla in a pot on medium heat, whilst whisking egg yolks with sugar, and then mix it all together and cool for 1 hour. Once its cooled, you then add in some extra milk and the butterscotch liqueur, warm it all up and then froth it. My family aren't really coffee drinkers so we don't have a coffee machine with a frother thing (no idea what it's called), but a hand mix will do just fine. Or at least I thought it would be a good idea, until I turned it on and everything spilt all over me!
 The interesting part is that you must coat the moulds with cocoa powder instead of sugar, because the sugar sometimes melts and sticks to the mould making it harder to get out, whilst the cocoa powder also adds some extra flavour to the outside! Another tip: place a small square of buttered baking paper on the bottom of the mould - it's like a double reassurance that the fondant will come out easily, and I wasn't going to take any chances :)
 Step 2: Chocolate fondant - this part also has a few parts too it. First you melt the chocolate and butter in a bowl over simmering water, and then you fold it into a mixture of eggs, egg yolks and sugar which was whisked until light and creamy and nearly doubled in size. Lastly, you fold through the flour and then spoon it into the buttered moulds.
 Being me, I stupidly forgot to take pictures of the choc fondant mixture before it was baked, and it looked soooo yummy, but I managed to remember in time, and took the rest of these pics. Hope you enjoy!
 Look at it ooozee... mmmm
 There are 4 left sitting in the fridge for now.. u have 1 hour to come and claim them if you want some, because my brother has already finished two within 30 mins, so eat up!
Hey guys,Alright, so I know I have been a bit slack lately, there has been a bit of a drought, but I have to blame that on Uni exams and also slightly on my laziness :)However, with much excitement I am back for another round!I have a slight issue, my family has lately become very angry with me, because with all these decadent and rich desserts I have been making, it hasn't exactly helped them with trying to lose weight or at least not gain any. So I figured this dessert would have to be somewhat respectful to their wishes, and by that I mean it involves fruit rather than chocolate, sorry for you chocaholics, but I promise soon I will bring you some chocolate desserts.Tonights recipe was taken from the masterclass episodes of Masterchef, and my choice was the rhubarb and blackberry souflee with crumble. I changed it a bit because I could only find frozen blueberries when I was at the supermarket, and couldnt be bothered going to other shops to look for it but it still tasted nice!This was a relatively quick and easy recipe, which involved firstly making the crumble and cooking it in the oven: (yes, I will acknowledge that this does not look soo appetising, but in my defence, this was before it was placed back in the oven and it became nicely golden and crispy!) Then making the fruit puree, which requires cooking the sliced rhubarb with sugar and water, allowing it to soften and then stiring in the lemon rind and blueberries, and cornflour to thicken the mixture. This part was really easy, and only took 15 minutes to cook, and then just cooled it in the pot until the souflees were ready to make.
 After it was all cooled, I whipped the egg whites with some sugar until soft peaks formed (I love the pic of the egg whites, it looks like a cloud I just want to jump in it... a bit weird?? haha)
 and then folded it through the fruit puree.
 NB: You must butter the moulds otherwise the mixture will be very difficult to get out when you eat it, this is something I know from previous experience :S Coating it twice in butter, and then rolling sugar around to stick to the butter, is the best way to do this!
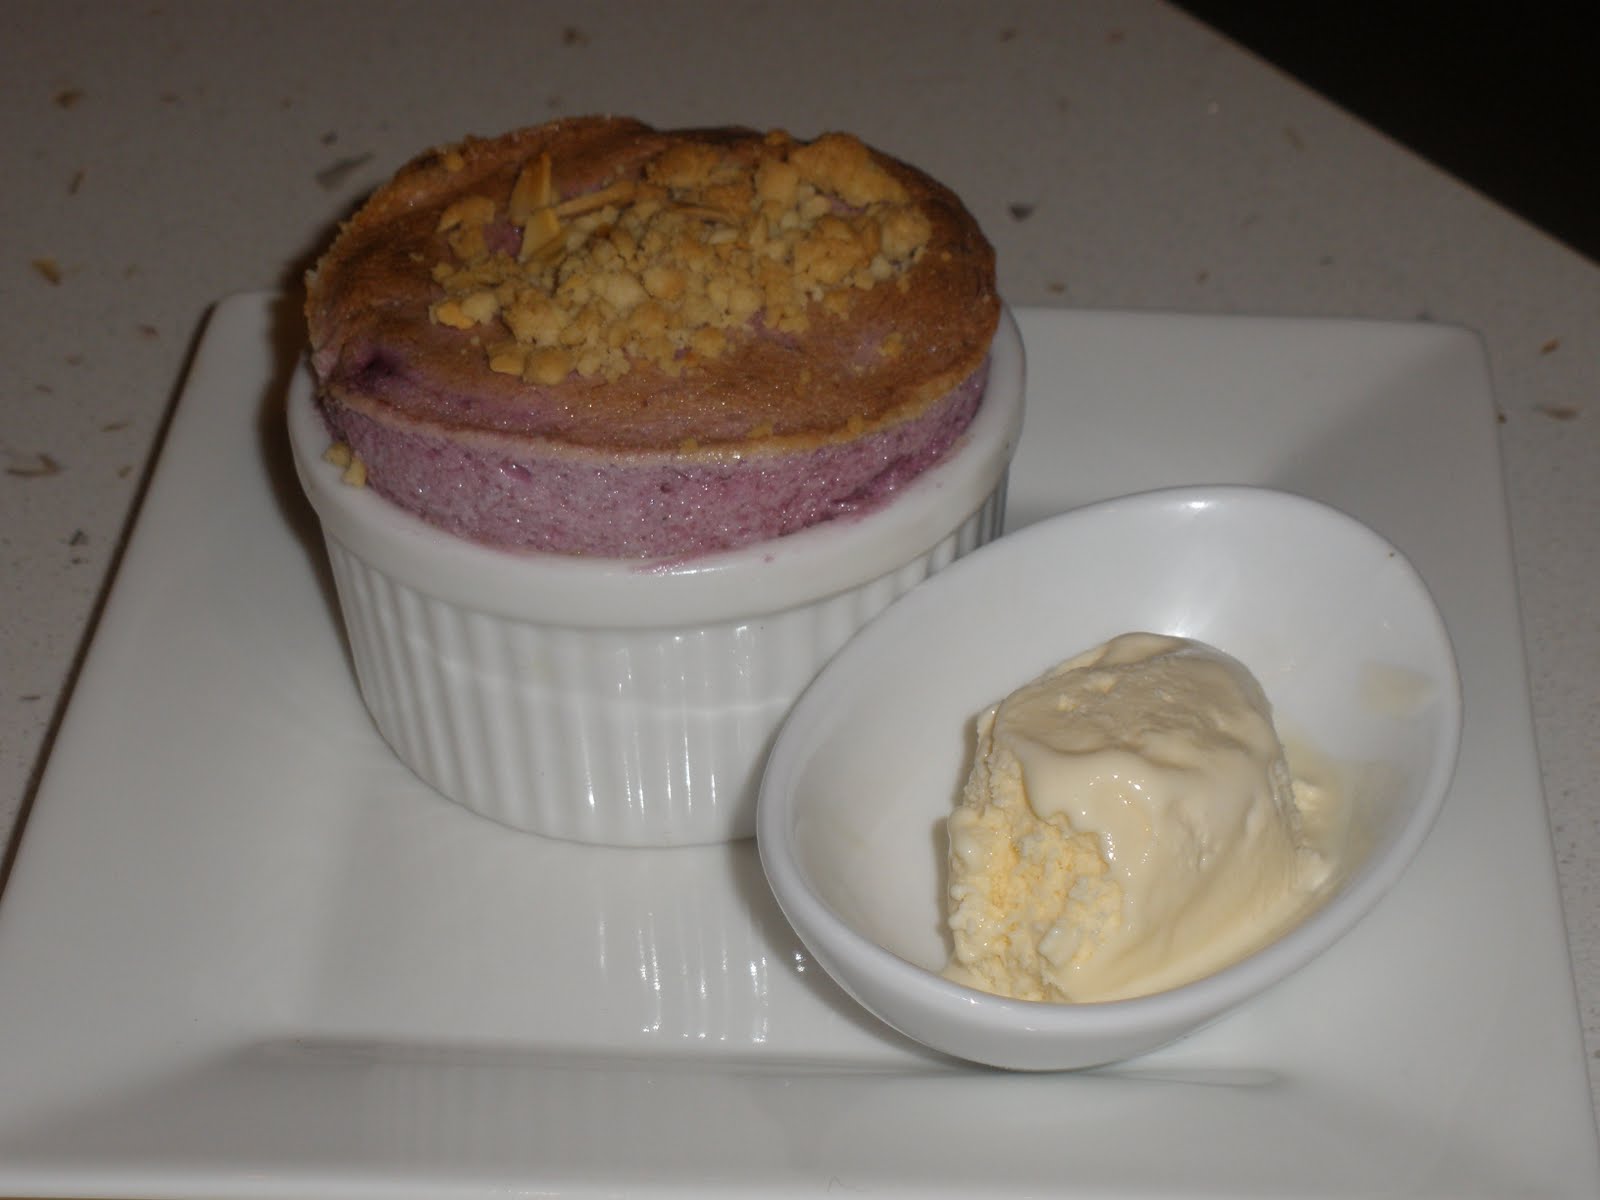
 I then placed it in the mould, which proved to be quite difficult as I had my cousin standing next to me eating the mixture as I was trying to put it in the mould (nothign a slap on the hand with the spoon couldnt fix :) )After all the moulds were filled, I popped it in the oven for 6-7 minutes, then removed them and placed a spoonful of crumble on top, returned it back to the oven for 3-4 minutes and viola!!This was definently an easy recipe, and went down VERY well. Suprisingly, it was actually quite sour from the rhubarb, but was nicely balanced by the crumble and abundance of sugar :) The best part is opening the oven to see that the souflee's are nicely risen, golden and that smell!!!!!Check it out (some nice rise-age on this one):
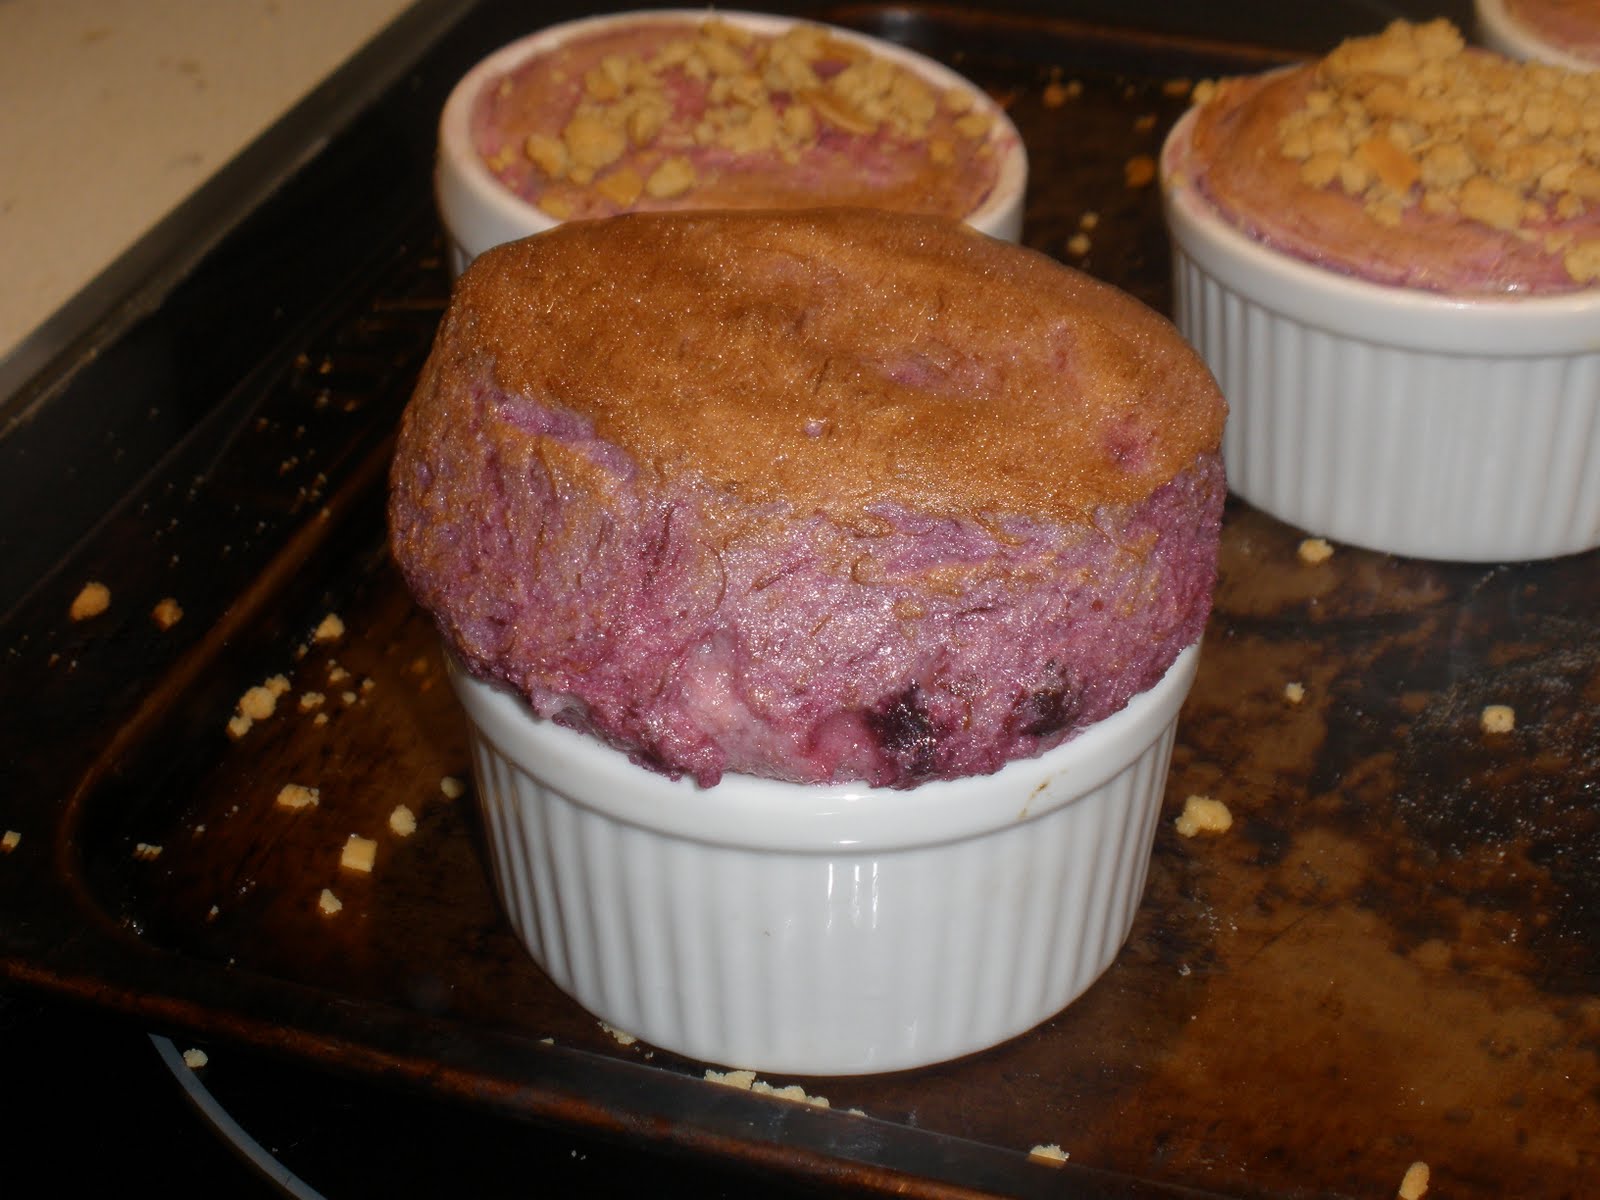
 Now... Check this one out, must have done somethign wrong along the way, because this is the most abnormal souflee I have ever seen, it nearly overflowed and then when i took it out, it completely deflated after 2 mins. Definently not my best, but at least the rest turned out well ;)
 Sorry, no more left-overs for those who want, but if your desperate you can go steal it from my grandparents fridge, or just whip it up yourself, will take max 50 mins, unless you eat it all before you cook it :)